At a Glance
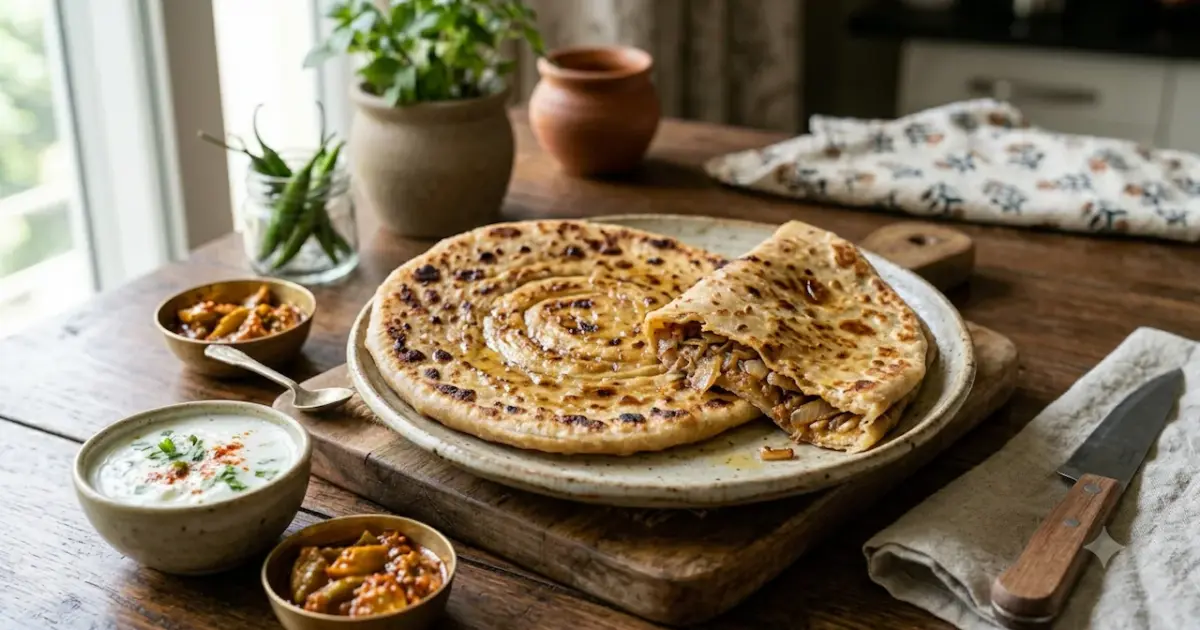
Learn how to make delicious dhaba-style onion paratha at home by mastering key techniques for dough preparation, creating a flavorful spicy onion filling, and achieving a perfect golden-brown crust on the tawa. This guide covers essential tips to avoid common mistakes and ensure your parathas are flaky, soft, and bursting with authentic flavor, just like those from a roadside dhaba.
Key Takeaways
The main points at a glance
- Resting the dough for at least 20-30 minutes is crucial for a soft, pliable dough that is easy to roll and results in flaky parathas.
- Squeeze excess water from finely chopped onions and use flour or breadcrumbs in the filling to prevent moisture from causing tears during rolling.
- Roll parathas to a thickness of about 1/4 inch and a diameter of around 6 inches; avoid rolling them too thin to maintain flakiness.
- Cook parathas on a well-heated tawa, using ghee or oil, and gently pressing with a spatula to help layers separate and cook evenly.
- Avoid common pitfalls like watery filling, rolling too thin, cooking on a cold pan, or rushing the process for the best results.
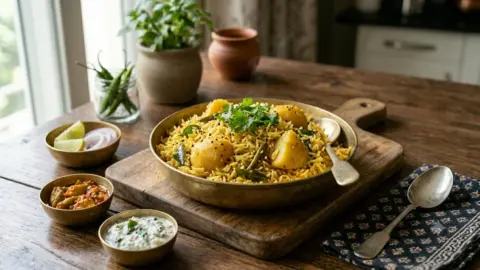
- Serve hot parathas with plain yogurt, pickled onions, dal, or chai for an authentic dhaba experience.
Why Dhaba-Style Onion Paratha Is So Irresistible
Imagine this: you are driving home after a long day, and the irresistible aroma of frying parathas wafts from a roadside dhaba. The cook expertly slaps dough onto a hot tawa, flipping it with a flick of the wrist, releasing the steam and the mouthwatering scent of onions, green chilies, and ghee. Your stomach rumbles, and you crave one. But when you try to recreate that magic at home, something is always missing. The paratha might turn out dry, the filling might leak, or the layers just aren’t flaky. It tastes good, but it doesn’t quite capture that authentic dhaba essence.
The good news is that achieving that dhaba magic in your own kitchen is entirely possible. You don’t need a professional setup or years of experience. With a few simple tricks and techniques, you can master the art of making perfect dhaba-style onion paratha. This guide will walk you through every crucial step, from preparing the dough and crafting the flavorful filling to achieving that perfect golden crust. By the end, your homemade onion paratha will rival those found at any roadside eatery.
The Secret to a Perfect Dough: Resting and Kneading
Dhaba cooks understand that great parathas start with great dough, and they never rush the process. The first secret to achieving that soft, pliable dough is allowing it to rest properly. This crucial step makes all the difference in the final texture.
Here are the ingredients you’ll need for the dough:
- 2 cups whole wheat flour (atta)
- 1/2 teaspoon salt
- 1 tablespoon oil or ghee
- Water, as needed (about 3/4 to 1 cup)
In a large bowl, combine the whole wheat flour and salt. Add the oil or ghee and rub it into the flour with your fingertips until the mixture resembles breadcrumbs. This step helps to make the paratha soft and tender.
Gradually add water, starting with about 1/2 cup, and mix with your hand. Continue adding water little by little until the dough comes together. The dough should be soft and pliable, but not sticky. If it sticks to your fingers, add a little more flour and knead again.
Knead the dough vigorously for at least 5 minutes. Push, fold, and repeat. The goal is a smooth, elastic dough that springs back slightly when you press it with a finger. This indicates good gluten development.
Now comes the most important part: resting the dough. Cover the bowl with a damp cloth or a clean kitchen towel and let it sit for at least 20 minutes. For even better results, let it rest for 30 to 40 minutes. This resting period allows the gluten to relax, making the dough much easier to roll and contributing to a flakier paratha.
Why is resting so vital? Kneading stretches the gluten strands. If you try to roll the dough immediately, these tight strands will resist and pull back, resulting in a tough paratha. Resting allows the gluten to relax, making the dough pliable and easy to roll thin without tearing – a true dhaba secret.
If you have the time, you can even prepare the dough in the morning and refrigerate it. Simply bring it back to room temperature before you plan to roll and cook. This extra resting time significantly enhances the dough’s texture.
Building the Spicy Onion Filling: Ingredients and Prep
The filling is where the dhaba-style onion paratha truly shines. It’s not just about simple chopped onions; it’s a vibrant, spicy, and tangy mixture that excites the palate.
Here’s what you’ll need for the flavorful filling:
- 2 medium onions, finely chopped (about 1 cup)
- 1-2 green chilies, finely chopped (adjust to your spice preference)
- 1/2 teaspoon ginger, grated or finely chopped
- 1/2 teaspoon cumin seeds (jeera)
- 1/2 teaspoon red chili powder (or to taste)
- 1/4 teaspoon turmeric powder (optional, for color)
- 1/2 teaspoon dry mango powder (amchur) – essential for that tangy dhaba taste
- Salt to taste
- 2 tablespoons fresh coriander leaves, chopped
- 1 tablespoon all-purpose flour (maida) or breadcrumbs – to absorb moisture
For the most authentic flavor, use red onions. Their sharper, spicier taste is ideal for dhaba-style parathas, unlike the sweetness of white or yellow onions.
Preparation is key. Chop the onions very finely. Avoid large chunks, as they can tear the dough and burst out during rolling. Aim for a consistency close to a paste. If using a food processor, pulse the onions briefly; don’t grind them into a mush.
After chopping, place the onions in a strainer and press them with a spoon to remove excess water. Wet onions are detrimental to a good paratha, leading to stickiness and tears. Squeeze them dry with your hands if necessary.
In a bowl, combine all the filling ingredients. Add the all-purpose flour or breadcrumbs; this acts as a binder, absorbing excess moisture and helping the filling hold together, preventing it from leaking out during rolling.
Taste the filling. It should be a balanced blend of spicy, tangy, and slightly salty. Remember, the dough itself has no salt, so the filling carries all the primary flavor.
Let the filling sit for about 5 minutes. This allows the flavors to meld and the flour to absorb the onion juices, creating a cohesive mixture.
Rolling Without Tearing: Tips for a Flaky Paratha
Rolling a stuffed paratha can be challenging for beginners, but with these techniques, you’ll soon master the art.
Start by dividing your dough into small, equal-sized balls, roughly the size of a golf ball or slightly larger. For a medium-sized paratha, a ball about 2 inches in diameter is ideal. Roll each ball smooth between your palms.
Take one dough ball and flatten it into a small disc using your fingers. Place about 1 to 2 tablespoons of the prepared filling in the center. Be careful not to overfill, as this is a common cause of tearing.
Gently bring the edges of the dough up and over the filling, pinching them together at the top to create a sealed pouch. Press this stuffed ball down gently to flatten it slightly.
Dust the flattened ball with a little dry flour. On a lightly floured surface, use a rolling pin (belan) to gently roll out the paratha. Start from the center and work your way outwards, applying even pressure. Avoid rolling too hard. Turn the paratha after each roll and roll from both sides to ensure the filling is distributed evenly.
If you notice any small cracks, seal them immediately with a dab of water and press the edges together. If the filling starts to show through, it means you’ve rolled too hard; stop and patch the area.
A key tip for flakiness: roll the paratha to about 6 inches in diameter. Dhaba parathas are not paper-thin; they have a moderate thickness of about 1/4 inch. This thickness allows for layers to develop, resulting in a flaky texture rather than a crisp one.
If you have two rolling pins, you can use one for the initial flattening and another for the final stretch. However, with practice, one rolling pin is perfectly sufficient.
Remember, practice makes perfect. Your first few parathas might not be perfectly round or evenly filled, and that’s perfectly okay. Enjoy them anyway! By the third or fourth attempt, you’ll likely get a better feel for the process.
Cooking on the Tawa: Getting That Golden Crust
Now for the satisfying part: cooking your dhaba-style onion paratha.
Heat a tawa or a flat frying pan over medium-high heat. A cast-iron pan is excellent for even heat distribution and achieving a great crust, but a non-stick pan will also work.
Ensure the pan is hot before placing the paratha. A good test is to sprinkle a drop of water; it should sizzle and evaporate quickly. If the pan is too cool, the paratha will cook slowly and become tough. If it’s too hot, it might burn before cooking through.
Carefully place the rolled paratha onto the hot tawa. Let it cook for about 30 seconds on the first side, or until you see small bubbles starting to form. Then, flip it.
This is where the magic happens: add ghee or oil. Dhaba cooks often use ghee for its rich flavor, but oil is also a suitable option. Drizzle about 1 teaspoon of ghee or oil onto the cooked side. Flip the paratha again and drizzle oil on the other side.
Using a spatula, gently press down on the paratha. This helps the layers separate and cook evenly, creating that desirable flaky texture. You’ll hear a satisfying sizzle as the ghee or oil works its magic.
Continue to cook for about 2 to 3 minutes on each side, flipping a few times. The paratha should develop a beautiful golden-brown color with appealing dark spots. These caramelized bits add depth of flavor.
A perfectly cooked paratha will be puffed in places, feel soft to the touch, and have a slightly crisp exterior. When pressed, it should have a slight spring back.
Once cooked, remove the paratha from the tawa and place it on a plate. For an extra touch of richness, you can brush a little more ghee on top – this is the authentic dhaba finish.
To keep your parathas warm and soft, store them in a casserole dish or wrap them in a clean kitchen towel. Avoid stacking too many at once, as they might stick together.
Common Mistakes and How to Avoid Them
To help you achieve dhaba-style perfection, here are some common mistakes made when preparing stuffed parathas at home and how to easily avoid them.
Mistake 1: Dough Consistency Issues
Problem: Dough is too dry (cracks) or too wet (sticky).
Solution: Add water very gradually when kneading. If the dough is too dry, add water teaspoon by teaspoon. If it’s too wet, incorporate a little more flour. The ideal dough is soft, smooth, and non-sticky.
Mistake 2: Watery Filling
Problem: Filling leaks out due to excess moisture from onions.
Solution: Finely chop onions and squeeze out as much water as possible. Incorporate flour or breadcrumbs into the filling to absorb any remaining moisture. Drain any excess liquid from the filling mixture.
Mistake 3: Rolling Too Thin
Problem: Parathas become crisp instead of flaky and tear easily.
Solution: Roll the paratha to a thickness of about 1/4 inch and a diameter of around 6 inches. Dhaba parathas are not as thin as regular rotis; their thickness is key to their layered texture.
Mistake 4: Skipping Dough Rest Time
Problem: Dough is difficult to roll and results in tough parathas.
Solution: Always let the dough rest for at least 20-30 minutes after kneading. This allows the gluten to relax, making the dough elastic and easy to work with, leading to softer parathas.
Mistake 5: Cooking on a Cold Pan
Problem: Parathas stick to the pan and cook unevenly.
Solution: Ensure the tawa or pan is adequately heated before placing the paratha. Test the heat with a drop of water; it should sizzle immediately.
Mistake 6: Incorrect Ghee/Oil Usage
Problem: Parathas turn out dry (too little ghee) or greasy (too much ghee).
Solution: Use approximately 1 teaspoon of ghee or oil per side of the paratha. This is usually enough to achieve a golden crust without making it overly oily.
Mistake 7: Not Pressing During Cooking
Problem: Layers don’t separate well, and the filling might not cook evenly.
Solution: Gently press the paratha with a spatula while it’s cooking on the tawa. This encourages the layers to separate and ensures even cooking of both the dough and the filling.
Mistake 8: Rushing the Process
Problem: Compromised texture and flavor due to haste.
Solution: Dhaba cooking is about patience and steady technique. Take your time with each step – kneading, resting, rolling, and cooking. Rushing often leads to less-than-ideal results.
Serving Suggestions: What to Eat With Your Paratha
You’ve successfully made a perfect dhaba-style onion paratha. Now, what’s the best way to enjoy it?
The quintessential dhaba accompaniment is a bowl of plain yogurt (dahi). Its cool, creamy texture perfectly balances the spicy, flavorful filling of the paratha. You can enhance the yogurt with a pinch of salt or a sprinkle of roasted cumin powder. Some also enjoy adding finely chopped cucumber or fresh mint to their yogurt.
Another excellent pairing is pickled red onions. Simply slice red onions, toss them with salt and a squeeze of lemon juice, and let them sit for about 10 minutes. Their sharp tanginess cuts through the richness of the paratha beautifully.
For a more substantial meal, serve your paratha with a simple lentil soup (dal). A light yellow moong dal or a hearty toor dal, tempered with cumin and garlic, complements the paratha wonderfully. The combination of warm, soupy dal and flaky paratha is a classic comfort food pairing.
Vegetable curries also make great sides. Traditional dhaba dishes like aloo gobi (potato and cauliflower) or baingan bharta (smoked eggplant) are excellent choices. Alternatively, a simple tomato chutney or a fresh mint chutney can add a burst of flavor.
For a quick and satisfying breakfast, enjoy the paratha on its own with a hot cup of chai (tea). Dipping the paratha into the tea is a truly authentic dhaba experience.
Leftover parathas are also a treat! Reheat them on a dry pan for a minute to refresh them, or use them as a base for a paratha roll. They make a delicious snack or a quick meal the next day.
Can This Recipe Be Made Gluten-Free or Vegan?
Yes, this dhaba-style onion paratha recipe can be adapted for both gluten-free and vegan diets.
For a gluten-free version, substitute the whole wheat flour with a gluten-free flour blend. A mix of rice flour, chickpea flour, and a binder like xanthan gum can work. Be aware that the texture might differ slightly, potentially being less flaky. You may need to adjust the water content and consider rolling the dough between sheets of plastic wrap to prevent tearing.
To make the recipe vegan, simply replace the ghee with a neutral-flavored oil, such as sunflower or canola oil. While the flavor profile will change slightly, the paratha will still be delicious. If you desire a richer taste, vegan butter substitutes can also be used.
The filling is naturally vegan if you use oil instead of ghee. Similarly, the dough becomes vegan by using oil. Therefore, with these simple substitutions, the entire dish can be made vegan.
Final Thoughts
Making authentic dhaba-style onion paratha at home is achievable with a little practice and by following these essential tips. You now have the knowledge to recreate that sought-after flaky, spicy, and golden paratha in your own kitchen. Be proud of your culinary accomplishment!
Key takeaways for success include: resting the dough adequately, ensuring the onion filling is not watery, rolling the parathas to the correct thickness, cooking them on a properly heated tawa, using ghee for flavor, pressing gently during cooking for layers, and serving with traditional accompaniments like yogurt and chai.
Embrace the dhaba way, and enjoy your delicious homemade parathas!
Frequently Asked Questions
What makes dhaba-style onion paratha different from regular paratha?
Dhaba-style onion paratha is known for its distinctively flaky layers, a generous spicy and tangy onion filling, and a rich, golden-brown crust achieved through proper cooking techniques and often the use of ghee. The emphasis is on robust flavor and satisfying texture.
Why is resting the dough so important for parathas?
Resting the dough allows the gluten strands to relax after kneading. This makes the dough more elastic and easier to roll thin without tearing. It also contributes significantly to the softness and flakiness of the final paratha.
How can I prevent the onion filling from leaking out?
To prevent leakage, ensure the onions are finely chopped and most of their water is squeezed out. Incorporating a tablespoon of all-purpose flour or breadcrumbs into the filling mixture helps absorb any remaining moisture and binds the ingredients together.
What is the best way to cook parathas for a golden crust?
Cook the paratha on a medium-high heat tawa that has been properly preheated. Use about 1 teaspoon of ghee or oil per side, flipping and gently pressing with a spatula to encourage even cooking and the development of golden-brown spots and flaky layers.
Can I make the dough ahead of time?
Yes, you can prepare the dough in advance. After kneading and resting it once, you can refrigerate it. Bring it back to room temperature before you plan to roll and cook the parathas for optimal texture.
What are the best accompaniments for onion paratha?
Traditionally, onion paratha is served with plain yogurt (dahi) to balance the spice. Other popular accompaniments include pickled onions, simple lentil dals, or a spicy vegetable curry. A cup of hot chai is also a classic pairing.
How can I make this recipe vegan?
To make the recipe vegan, simply substitute the ghee with a neutral-flavored cooking oil like sunflower or canola oil. The rest of the ingredients and steps remain the same.
References
- Make Perfect Dhaba-Style Onion Paratha At Home With These Simple Tips – Original report (NDTV Health)
- From Chaat To Kulfi, 14 Food Joints That Make Sindhi Colony Hyderabad's Street Food Icon – NDTV Food – This article highlights street food joints in Hyderabad's Sindhi Colony, but its full text was not available.
- Coffee Obsessed? Check Out These 5 Cafes In Delhi For Customised Delights – NDTV Food – This article lists cafes in Delhi for customized coffee, but its full text was not available.
- Ingredient Spotlight: The Best Ways to Use Spring Onions – NDTV Food – This article discusses uses of spring onions, but its full text was not available.
- Neena Gupta Kickstarts Her Day With This Yummy South Indian Dish. Can You Guess What It Is? – NDTV Food – This article covers Neena Gupta's morning South Indian dish, but its full text was not available.
- Watch: How To Make Onion-Capsicum-Tomato Stuffed Paratha Without Atta Or Maida – NDTV Food – NDTV Food